Learn how to frame a picture without a mat using fabric or wallpaper behind your artwork
Every time I hang new art in our home, I always wish I’d done it sooner instead of overthinking it and being picky. Every. single. time. This is a really handy project because matting artwork professionally is expensive and it really slows down getting artwork on your walls. Especially after you’ve spent a lot of time overthinking what to hang in the first place!
When my storage was overflowing and interfering with daily life in my studio Eventually I set out to find a way to use what I have to get some of that art out of storage and up on the walls. I realized that instead of waiting to acquire perfectly paired artwork, frames and mats, I could just use fabric to back art pieces and frame them without a mat. Right away.
Here’s a tutorial if you’d like to do the same. Read on for fool-proof tips for a classic look or jump ahead to the step-by-step instructions.

Framing Monet Without a Mat

The first piece I decided to try this on was this thrifted exhibition poster of Monet’s The Parc Monceau framed in a lovely soft gold, mottled frame. I didn’t care for the text displayed below the painting or the unequal top margin, but I couldn’t pass up Monet for $20 – a ringing endorsement if I ever heard one.
Monet painted 6 views of the Parc Monceau – 3 in 1876, and 3 in 1878. This piece is a print from the latter series, and much smaller than the original which measures 28 5/8 x 21 3/8 inches. There are a few variations on the title floating around the internet. I decided to go with the Met’s title for it, because they probably know what they’re talking about. You can read more history or go see it at the Met. Parc Monceau is also the name of an Atlanta antique store of great repute in the design world. I’ve been window shopping their instagram.
I brought the Parisians home with me and stuck them in the corner until I finally figured out a new location for their parc: above the toilet in our primary bathroom.
….
Okay.
Now that I’m writing this I feel a little guilty that in breaking the fourth wall in their park they’re seeing… something they didn’t bargain for on that day trip.
…
Let’s redirect.
Monet himself once said:
“Everyone discusses my art and pretends to understand, as if it were necessary to understand, when it is simply necessary to love.”
Oscar-Claude Monet (1840–1926)
I think this is what I’ll tell the Parisians, should they complain.
Before lovingly placing the Parisians in our throne room, I cut the print out without a border and mounted it on a piece of ivory linen, allowing the painting to scream Monet instead of the label beneath it. Actually that brushstroke font is an imitation of his signature. Whatever – he didn’t sign it that big on the painting on purpose.
You can see our whole primary suite reveal in my One Room Challenge reveal post.
Skip ahead for the tutorial, or stick around to talk about ways to make this framing technique look (at least) passable – classic, even – and not the total disaster it sounds like it should be.
Suitable Artwork to Frame Without a Mat
This works with any subject matter really – family photos, reproduced prints
– IF –
the artwork is flat.
This sounds insulting to mention, but it’s true and I don’t want you to try this and blame me if it looks horrific. Or, perhaps you hadn’t considered this (you are here for a tutorial after all) and I’ve insulted you by saying that’s insulting to mention. My apologies.
You cannot frame artwork with any thickness whatsoever (ie canvas) behind glass without a mat. It’ll create a sandwiched, trapped effect with a drop shadow to boot. Undesirable. A mat offers hiding power that this technique does not.
So, keep it flat if you don’t want to mat.
Did I just create a motto for this blog post? ….a…matting motto?
There is a caveat. Matting is not just for aesthetics. It also provides an air cushion between the glass of the frame and the artwork, protecting it from condensation that may arise from humidity trapped in the frame. This is also why professionally matted pieces have paper backing glued on covering the seams of the backing board. I haven’t had humidity problems in my artwork personally, but the internet tells me it’s a thing. So if you’re worried about protecting something really precious, you may want to stick with a traditional mat. Or get it professionally framed if it’s that important to you.
Otherwise, I can see myself doing this with a great number of items I’d like to display.
Try it with pictures, posters, drawings, paintings, pages from children’s books, postcards or anything else as long as its maximum thickness is that of a thick cardstock or thin chipboard (which is stiffer than cardstock, and in fact the backing material of my Parisians).
And this just clicked – I have a never-ending rotation of kids’ artwork in our house that I love to showcase. It usually ends up taped to the windows in our kitchen, but framing without a mat would allow a quick swap to feature the pieces they’re most proud of.
If you’re ready to frame, skip ahead.
Do you still need convincing?
You can take any empty frames you’ve acquired that are too large for the artwork or photos you have on hand and…just frame them without a mat! But that’s not all… (cue gameshow music)
DA DA DAAA

Do you have a (flat) keepsake to showcase? A wedding invitation or concert tickets? Perhaps artwork you’ve received as a gift and must display out of familial obligation? Mounting any and all of these things on fabric is a simple, chic way to display them. No mat or shadowbox needed.
DA DA DAAA

Artwork on paper you’d like to showcase the edges of is particularly well-suited for framing without a mat. For example, sketches on torn paper or anything with a deckled edge (fancy for torn edges). I framed one of my old gestural sketches on a black faux suede, allowing the torn paper to show to complement the freeness of the sketch. Also to prevent paying for or cutting an enormous mat. WIN WIN.
As somewhat of an impulse buyer of thrifted art and frames, I’ve collected a pile of pictures that are not quite ready to hang. Some of them need re-framing, or a matting change – and some empty frames need pictures, but have no mats.
Basically this is a simple way to put mismatched frames and art on display that saves you from the time and expense of a formal matting job. Can you say win-win-win? (Yeah, I had no idea on the syntax there so I did it both ways and didn’t take the time to even google it bc this post is taking forever to write. Feel free to offer a fix in the comments)
Backing Material Options to Frame a Picture Without a Mat
Without a mat, you need a backdrop to fill in the border around your artwork to hide your backing board. I have some tips for success with fabric and wallpaper below, but these rules can absolutely be broken as each art and frame combination is unique and there are limitless possibilities for a truly custom DIY piece of artwork.

Use your judgement as to what best complements your specific artwork when selecting your mat alternatives. Here are some starting points to consider.
Keep it Simple for Guaranteed Success
For a low risk and low decision barrier option when framing picture without a mat, keeping it simple with a neutral fabric or wallpaper backing. This helps things look more polished and classic than crafty, and keeps your eye on the artwork itself instead of the lack of mat.
Fabric
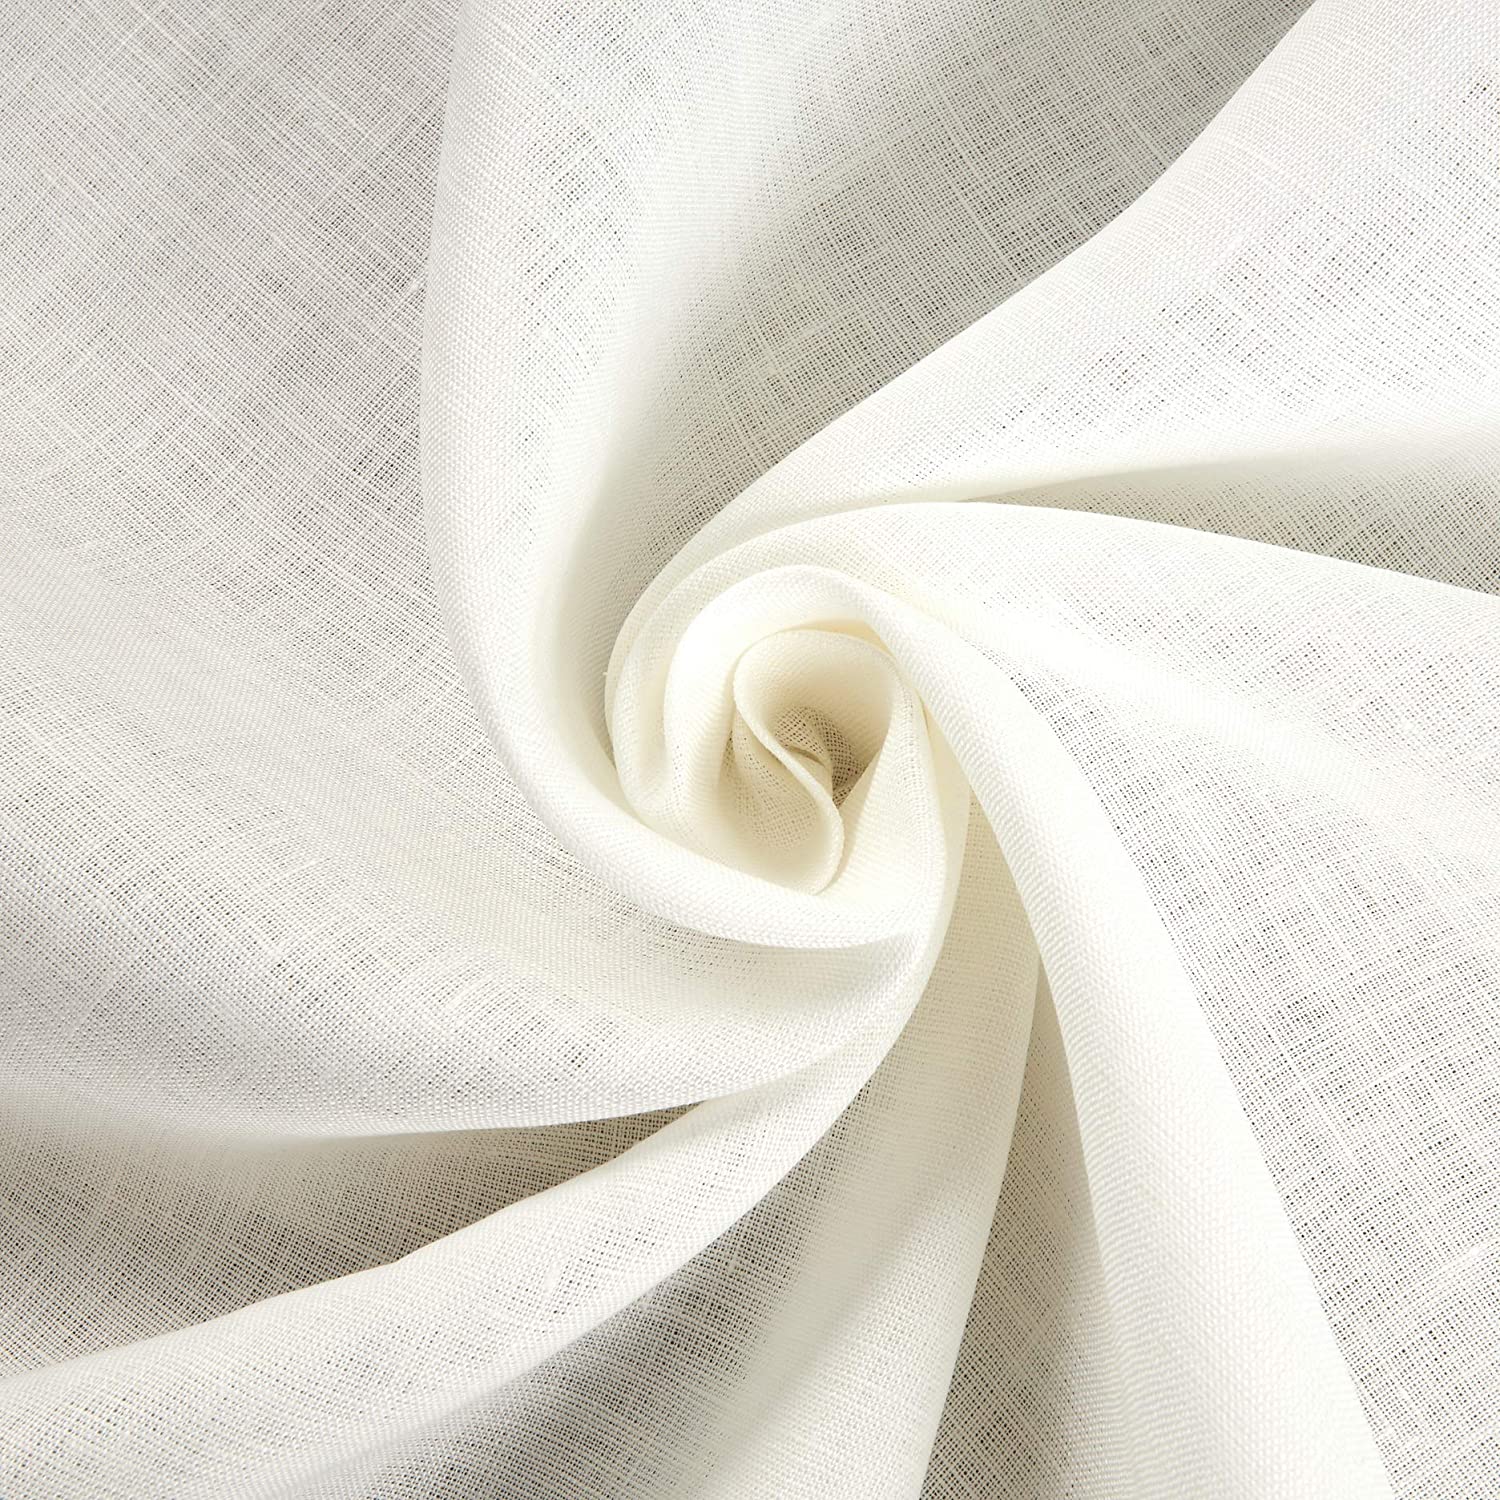
For a classic look that will let your artwork be the focus I recommend going natural with solid colored linens, plain weave cottons, burlap or suedes or low pile velvets. You don’t want the fibers getting crushed and distorted – that’ll be ugly. Remember our MATTING MOTTO??? Me neither.
I used a medium weight ivory linen for the Parisians. Ivory muslin, cotton and linen blends are all great neutral options that will let your artwork be the focus. Muslin will be the cheapest option. I haven’t tried it, but I think it’s a suitable fabric for framing a picture without a mat. It can have some color variations in it, but they’re typically subtle enough that it won’t be a problem.
If you use a lightweight fabric, you may have to double layer to hide your backing board.
You can use any fabric that’s not silky/slippery, really. Synthetic fabrics can often fall into the too smooth, shiny or slick category that I created just now – I’m looking at you, satin. These will at best make it harder for your picture to stay in place. At worst, they’ll contribute to strange glare, and often stand out instead of complementing your artwork. Just use your judgment and keep a high bar for quality if you go the synthetic route.
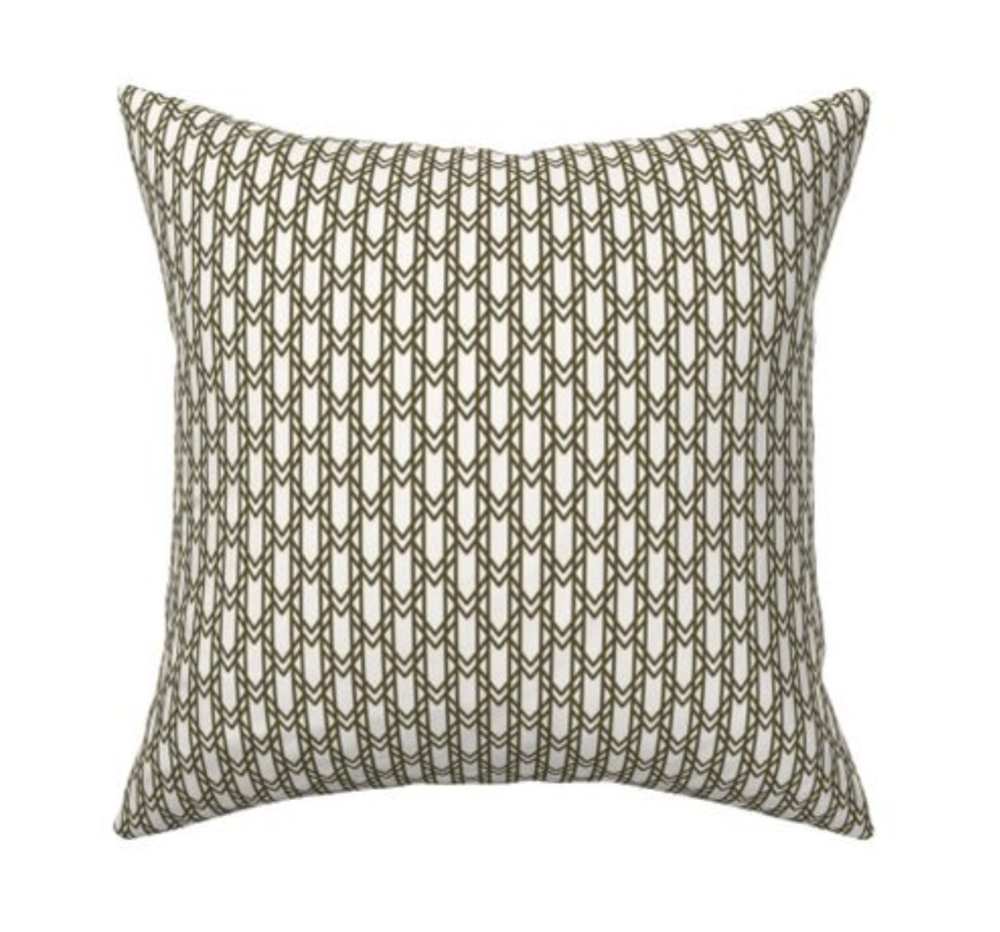
Pattern
While keeping things neutral will work in framing every time, whether you’re framing a picture with or without a mat you’ve usually got a small enough border left to work with that you can take some risks and add some personality. Typically you’re left with no more than 1-2″ to fill unless you’ve got a very large piece or just want a larger margin.
I can imagine adding some really loud patterns I wouldn’t normally feel comfortable using in other places in our house since a picture is often such a small part of a whole room. For instance, maybe a colorful Missoni chevron ikat with a charcoal sketch. Or a delicate small scale block print paired with a landscape.
A good rule to follow here is to keep the scale of the pattern small enough to feature a visible repeat around your artwork. But I can think of exceptions to that scale advice, too.
Wallpaper
Wallpaper works for framing a picture or artwork without a mat, too. But, wallpaper designs are (obviously) scaled for walls. So look for a small motif, or go for added texture or a foil sheen for visual interest instead of pattern unless you’re framing something big. A slight, even metallic weave or gilding will work.
And, if you match wallpaper to the wall behind it, you’ll end up with a faux floating frame.
If you cut precisely (tools and tips below, read on), you may even be able to use it like a mat and cut a rectangle with a 1/4 inch overlap on all sides of your artwork. But, I do think this can look a bit unfinished without the depth of a mat. Experiment and see if it works. I think a double reveal with a darker paper inset would look better if you’re looking to try a cut out approach. If you’re mixing it in to a gallery wall above eye level I doubt anyone will really notice anyway.
Designer Fabric & Wallpaper Remnants
You can often find deep discounts on designer fabric remnants, and this project is a great way to bring them into your home without needing to worry about sewing.
Adding Interest with Visual Texture & Scale

Let’s talk visual texture. That’s art and design speak for 2D elements and their perceived qualities instead of 3D – what you’re seeing, not experiencing tactilely. This is a very nuanced topic. In its simplest terms, it’s whether something looks “busy” or not.
We’re avoiding crushing high pile and textured fabrics, but visual texture is absolutely fair game and can only add to the specialness of a custom frame job – as long as the fabric is not too thick or plush. Intricately woven flat fabrics, thin corduroy and other highly visually textured fabrics could add a very interesting finishing touch.
Ready? Here we go.
How to Frame Pictures & Art Without a Mat
Supplies & Tools to Frame Art Without a Mat
- Picture frame
- (Flat) Artwork, photo or memorabilia
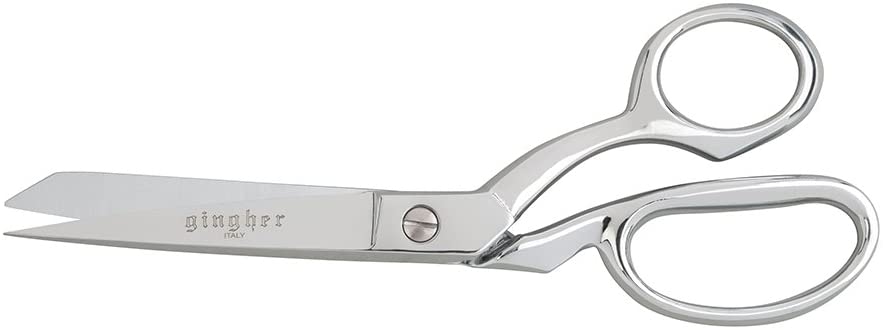
- X-acto/craft knife* / scissors
- Linen Fabric / fabric or wallpaper remnant slightly larger than your frame (similar 1 | similar 2 | similar 3 | muslin)
- Fabric glue / Elmer’s glue / super glue
- Fabric shears or rotary cutter / scissors
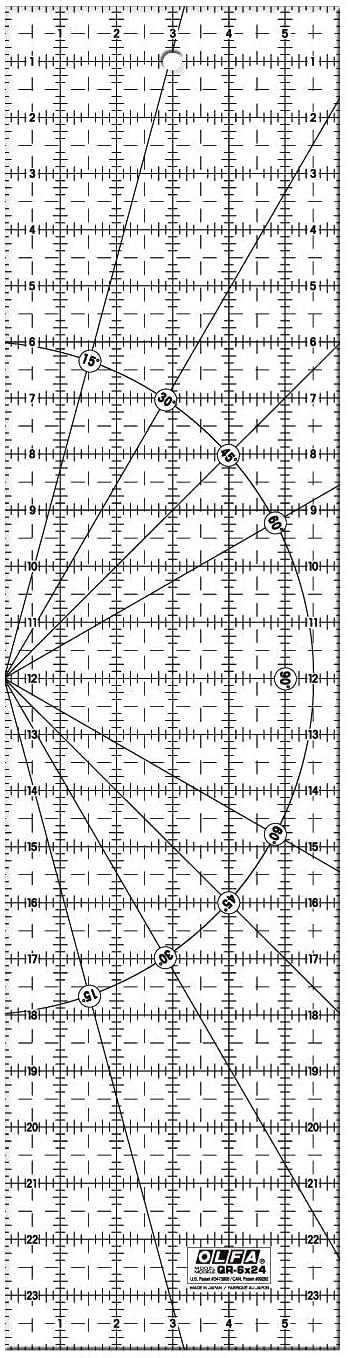
- Gridded Quilting ruler / suction handle / ruler
- Cutting mat (this one is my go-to portable size for random projects around the house)
*I do not recommend the cheapest standard x-acto pictured here. I need a new rubber grip x3000 model – I lost mine in our move. It has an anti-roll handle and stores an extra few blades. Fiskars’ craft knife gets good reviews, but I stick to what I know works well for me. And just so you know, the safety cap doesn’t stay on any of them, so don’t go by the negative reviews about that. You’re going to need to add a strip of tape to the lid if you’re trying to transport the thing. Yes, this is a whole paragraph about craft knives. They’re that important to have in your toolkit.
Step 1: Remove Backing Board from Picture Frame
Loosen the backing board from the frame by opening up any staples or prongs with a sturdy tool. A bone tool, letter opener, or a dinner knife will do (my weapon of choice for this frame job). Try to pry them evenly without twisting them. They can only take so much, and once they’re stressed they’ll snap eventually. Go easy.

Just please don’t use your fingernails. It will hurt*.
*Can confirm. Didn’t follow my own advice again last week. My sore thumbnail took 5 days to heal.
Step 2: If Needed, Trim Artwork to Size

Using your X-acto and a straight edge, cut along the edges of your artwork.
Leaving no margins will work, but some photos and artwork may have an equal border around the edge that looks fine – 1/8″ – 1/4″ is pretty standard. I decided to try a teensy margin on Monet just to see if it would work, against my better judgment – all that was possible with the signature below the print was about 1/16″ – and quickly decided to cut to the edge of the artwork instead.
Keep a firm hold on your straight edge and place it OVER THE ARTWORK – NOT YOUR SCRAP EDGE. Slips are inevitable and your straight edge will protect your pictures. It’s better to do multiple passes than to rush.

You may need to flip your art and finish cutting along the back if it’s on chipboard like my Parisians – just follow the faint score line.
And pay attention to see if your edges are starting to snag – you may need a fresh blade sooner than you think.

Step 3: Iron Fabric if Needed
Well, do you need to? Go on then.
I actually didn’t iron the linen I used here. Smoothing it by hand as I secured it was sufficient.
Step 4: Cut Fabric
Cut your linen or other fabric of choice to size by laying your backing board on the fabric and cutting around it, checking whether to double layer if your fabric weave is too open or sheer to hide your backing board.
A rotary cutter is another great time saver to have on hand if you do a lot of fabric projects, if not fabric shears are definitely worth it (I have these in the lefty version). I tend to just eyeball a margin around the frame without using my straight edge as a guide, but read on before starting because…

You can measure your fabric to fit in one of three ways. The first two wrap around the edges of your backing board, which helps to prevent the fabric from sagging in the frame over time.
Trimming option 1: For thin fabrics, it works to cut your fabric just slightly larger than your backing board – maybe a half an inch perimeter. This allows the fabric to be glued under the lip of the frame, and be held in by the rabbet (inner edge) of the frame, without much wrapping around the back. It can be a little sloppy looking when you flip the piece over, but you can cover it with acid free Kraft paper if you want a more professional finish.
Trimming option 2: For wallpaper and fabrics that may get wavy or bubble when placed into the frame (like the sueded material I used behind my figural drawing), is to leave a 1 or two inch margin, and cut out squares or 45º angles from each corner to allow you to wrap your fabric around the backing board without adding excess bulk that won’t fit back into the frame.
Trimming option 3: For wallpaper and thick fabrics, cut your fabric flush with the edge of your backing board. This is your only option for thick fabrics are too thick to wrap around, or ones with a really strong weave that won’t sag over time. Think cotton canvas or heavier basketweaves, real suede, wool felts, most corduroy.
Step 5: Align Fabric and Secure in Place with Glue
Next, you need to secure your fabric in place. Lay it centered atop your backing board, lining up your corner cut outs if applicable. You may want to place something on top to keep it from shifting. Nearby vase? Mug? Book? Choose your own adventure.

Carefully lift the edge of your fabric starting in one corner and dab small dots of glue (I used this one – acid-free and USA made) around the edge of your backing board every two inches or so, one side at a time, going around clockwise. Try to keep any glue you apply to the front around the very edges so they will be covered by the frame in case they bleed through.
I pause after each side to give the glue some tooth before I move to the next side so I don’t create more work for myself accidentally drag glue into the frame reveal and have to re-cut the fabric.
Allow to dry according to the instructions on your glue of choice.
Step 5.5: Flip and finish securing fabric, if needed
If you opted to leave a larger margin of fabric, once your front-facing glue is dry, it’s time now to flip it. Glue down the flaps around back of your backing board, using gentle tension to avoid bubbling or loosening your glue around the front edges. I like to upend the backing board for this part and smooth the edge around in small sections as I go to keep an eye on the front to see how the fabric is behaving.
Step 6: Lint Roll your Fabric & Wipe down your Glass
There’s a good chance you’ve got little paper scraps or dust on your fabric backing and/or glass. Gently use a lint roller or pick off obvious offenders from your fabric with your fingers. You can also – gently – use a little piece of regular Scotch tape to de-fuzz your fabric. You don’t want to wiggle your glue loose.

Wipe down your glass with a lint-free cloth – I’m a fan of this one by e-cloth. I’ll explain the marker next.
Step 7: Measure to Center & Place Artwork
There are a few ways to measure to center your artwork before the final assembly of your un-matted artwork. You can either measure in from the edges of your backing board and attach your artwork to it (step 7.5 has details) OR use your frame glass and place the artwork down on it, then sandwich it with your backing board. I’ll use glass as my example here. My secret weapon is a dry erase marker.
If you’re working with a standard ruler (cork-backed with etched markings is best for cutting projects): Measure your artwork horizontally, then your glass in each direction. Then subtract your art dimensions from your measurements, and divide that by 2.
{14 inch glass} – {10 inch wide photo} = 4 inches
4 inches / 2 = 2 inches on each side of artwork
Repeat for your vertical measurement.
You can’t mark your fabric to place your picture without risking it showing on your fabric, so I mark the glass.
Measure in from each corner of your glass, and mark with a dry erase marker (my mini fine tips | Expo). Do as I say and not as I do and wipe down your linty glass first. Yes, I wiped off my marker while cleaning up the lint and had to re-draw it.

Now, place your artwork on the glass, using your markings as a guide to adjust your perfectly centered masterpiece. I hold it down with a thumb as I start placing the backing board.
Don’t forget to erase any dry erase markings!
Other Framing Measuring Tools
You may be able to skip the measuring if you have a gridded cutting mat. It makes very quick work of this, as you’re able to just eyeball the squares on either side. Obviously a ruler or a gridded ruler will work too. If you don’t have a larger ruler, I find the 2′ size of the gridded quilting ruler useful for many quick projects like this. I pick it over a metal ruler 9 times out of 10. It’s large enough to measure across most frames, and its transparency allows quick adjustments with less repositioning of the ruler.

Step 7.5: Secure your Artwork
If you’re attaching your artwork to your backing board and then framing, it’s time to place your artwork according to your measurements. One little thing though.
Without the thickness of mat board, you may need to add some friction to keep your art from sliding out of position. You may be able to angle your tabs/staples on the back of your frame in at a steeper angle for more pressure. But you may need adhesive.
Several options are available as solutions. Double-sided craft tape has stronger stick than regular tape. This one looks promising, but I didn’t have any on hand when I first framed my Parisians without a mat. You can make good old-fashioned tape loops if they won’t show through your artwork (too thick for a thin photo paper) with my favorite non-destructive artists’ tape (USA made), or glue your artwork to your fabric with your fabric glue (USA made) or hot glue. I’d test with a scrap of trimmed material before committing to a liquid adhesive. You can also go with regular double-sided tape, or scotch tape loops. The world is your oyster.
Did you remember to erase those markings? Now’s the time.
Notes: I skipped this step with Monet. When I framed him in Summer, humidity was at its peak and the wooden frame was tight enough. By Fall, the Parisians were on the run. I’ve adjusted them but they need reinforcement. Hence the craft tape entering the…wait for it…picture.
The suede I used to back my gesture drawing had enough tooth in the fabric to hold the porous sketch paper in place and hasn’t budged with nary an adhesive. So the fabric you choose will make a difference.
Step 8: Re-Attach Backing Board
Whip out that dinner knife and ply those prongs and staples back into shape. You’re going to be excited that you’re almost done – don’t forget to be gentle to prevent wear and tear.
C’est tout! (She said as if she didn’t just casually write a research paper on how to frame art without a mat of her own volition. Did you actually read all that?)
Maura
Pin It